
Guide for Survey Creator
1. Login as an Administrator
The homepage of DepEd Monitoring is at mobileapp.deped.gov.ph. To login as an administrator, you will see the "Admin Login" link at the lower right portion of the page. Click it and input your administrator credentials on the login form. Click login and you will be redirected to the Admin Portal Dashboard.
On your initial login, you will be redirected to your account profile. You will be asked to update your temporary password.
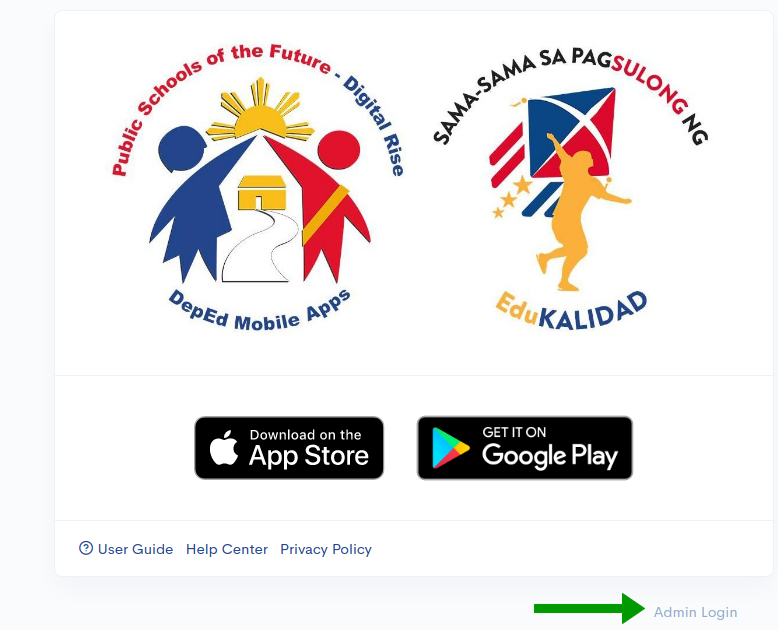

Figure 1. DepEd Monitoring Landing Page (left) and Admin Login Page (right)
2. Admin Portal Interface
The user interface for the Admin Portal is very straightforward and easy-to-use. In this chapter, we will discuss the four (4) main parts of this portal.
- Navigation Bar - In this portion, you will see a list of links that will help you access different parts of the Admin Portal.
- Main Content - In this portion, all of the information are displayed in table form. There will be action buttons (view, edit, or delete) for each row. In most modules, there will be a New button displayed on the upper-right part.
- Account actions - you can view your account by clicking this button
 . To logout, simply click this button
  .
. - Filter - to narrow down the list or data displayed in the Main content, you can use the filter fields in this portion. The available fields will vary depending on which module you are currently in.
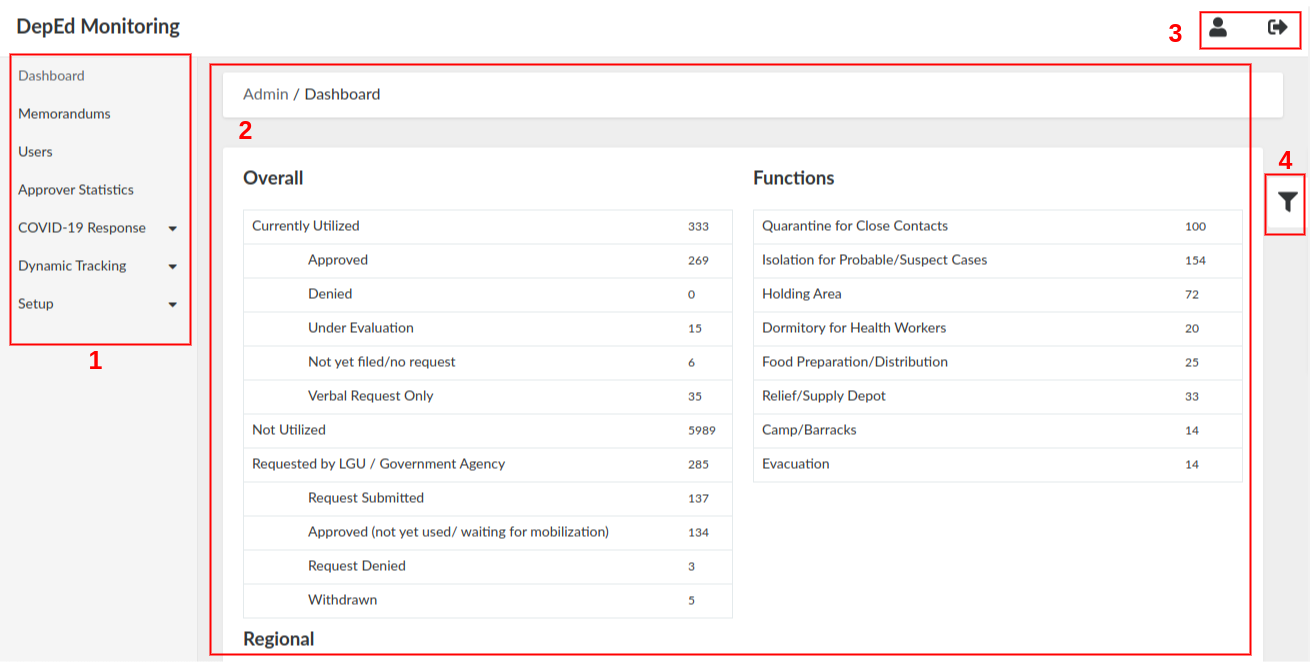
Figure 2. Admin Portal Dashboard
2.1. Dashboard
Dashboard is the homepage of the Admin Portal (see Figure 2). It contains the statistics of the responses gathered from the Facility Tracking survey (COVID-19 Responses).
The figures displayed here will change depending on what type of administrator is currently logged in. For example, as a Survey Creator, you can see the data here starting from the national level. You can narrow the data down by using the filters on the right (i.e. display data specific for NCR). Another example is if a Division IT Officer (DITO) is currently logged in, the available data displayed for them is already filtered by their designated division. They could only see the statistics for their division and the schools under it.
3. User Management
There are two kinds of users in DepEd Monitoring: an administrator and a normal user (survey respondents). As a Survey Creator, you can only access the users list.
3.1. View User List
To view all the respondents, simply click Users on the navigation bar.
On the top, you can filter the list by clicking a specific status:
-
- Active - approved users
- Pending Approval - users that have confirmed their account, but are not yet approved
- Rejected - users that have confirmed their account, but are rejected
- Unconfirmed Registrations - users that have not yet confirmed their account
More filters are available if you click the filter icon on the right. Available filter fields are: Email, Email validation status, Name, Mobile, Created at.
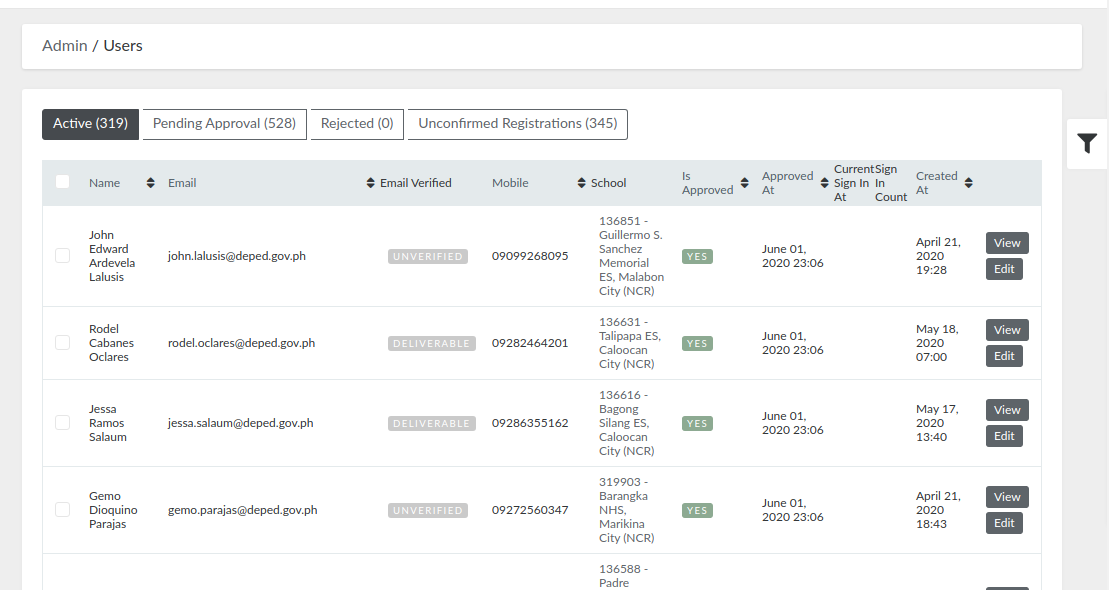
Figure 3. User List
3.2. View a Specific User
Step 2. Search the specific user, and click the View button on the right.
In the view page, you can see the following data:
-
- User details - general information of the user
- Special assignments - surveys they are assigned to answer
3.3. Edit a User
Step 2. Search the specific user, and click the Edit button on the right.
Step 3. Update the user details.
Step 4. Click the "Update User" button.
Another thing that can be done on the user edit form is assigning the user to survey(s). This will be discussed in detail on Chapter 4.5.
4. Questionnaire Management
4.1. View Questionnaire List
To view all the questionnaires, go to Dynamic Tracking, then select Questionnaires.
On the top, you can filter the list by the questionnaire's allowed respondents (DepEd Users, Limited, Parents, or Students). You can also view all the archived ones by clicking the "Show Archived Questionnaires" button.
More filters are available if you click the filter icon on the right. Available filter fields are: Title, Description, Status, Created at and Updated at. Email validation status, Name, Mobile, Created at.
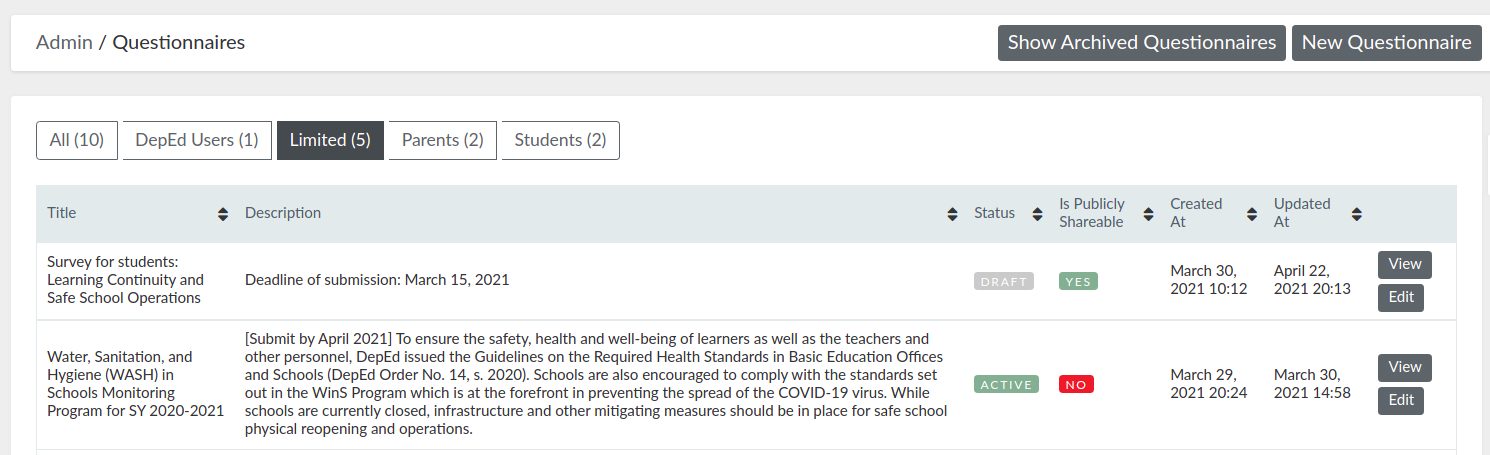
Figure 4. Questionnaire List
4.2. Create a New Questionnaire / Survey
Step 1. Go to Dynamic Tracking, then select Questionnaires.
Step 2. On the upper-right portion of the page, click the "New Questionnaire" button.
Step 3. Fill out the new questionnaire form.
-
- Title - display name of the questionnaire
- Description - this is an optional field; can be used to add remarks or deadline for the questionnaire.
- Allowed Respondents
-
- All DepEd Users - teachers or the approved users in DepEd Monitoring
- Limited DepEd Users - survey can be assigned to specific users only (see Chapter 4.5)
- Parents - this option is specific for public surveys
- Learners - this option is specific for public surveys
-
-
- Share to non-DepEd individuals? - tick this checkbox if you want the survey to be public.
-
- the URL of public surveys for teachers and parents is mobileapp.deped.gov.ph/questionnaires
- the URL of public surveys specific for learners is mobileapp.deped.gov.ph/learnerssurvey
-
- Share to non-DepEd individuals? - tick this checkbox if you want the survey to be public.
A public survey can still be seen on the mobile application by an approved DepEd user. The user can choose to answer the survey on the mobile application, or anonymously via the public URL.
-
- Questionnaire type
-
-
-
- survey - this survey records only one entry per user.
- tracker - accepts multiple submissions. This is typically used for progress reports.
-
-
-
- Questionnaire type
-
- Allow response resubmissions? - for survey-type questionnaires, tick this checkbox if you want to allow respondents to modify or update their entries. By default, tracker-type questionnaires allow response resubmissions.
- Deadline - this is an option to put a deadline on a questionnaire; date of the deadline is displayed on the description of questionnaire on mobile view
Step 4. Click "Create Questionnaire" button, or you can proceed to adding questions (see Chapter 4.3).
After creating new questionnaire, its initial status will be DRAFT . It will not be visible yet to the allowed respondents. You will need to activate it first (see Chapter 4.4.3).
4.3. Add Questions to Survey
Step 1. On the new or edit questionnaire form, click "Add/Edit Questions" tab.
Step 2. Click the "Add New Question" button.
Step 3. In the Content field, type in the question or the information you want to get from the respondent.
The content field allows specific html tags. Use <b></b> for bold letters, <i></i> for italics, and <br> for a single line break.
Step 4. Select question classification.
-
- Yes/No - used for questions answerable by yes or no.
- Numeral - used for questions needing a numeric response.
- Free form - allows respondents to answer freely. It accepts alphanumeric characters.
- Image - used if you need the respondent to upload an image.
- File upload - allows respondents to upload files like pdfs and docs.
- Select - for questions with multiple choices needing ONE answer.
- Checkbox - for questions with multiple choices accepting multiple answers.
- Ranked - used for questions where the respondent is asked to arrange the given choices.
- City/Municipality - used for geolocation responses.
- Division - used for geolocation relating to divisions in the Philippines.
- Region - used for geolocation relating to regions in the Philippines.
- School - used for selecting schools under the Department of Education.
- Header - for header types of texts such as Titles
- Paragraph - for long texts such as instructions.
- Date - used for selecting date (mm/dd/yyyy).
Step 5. Tick the checkbox for "Required" if you want to require the user to answer this question. Leave it unchecked if you want the question to be optional.
Repeat steps 2 to 5 until all questions have been added. You can rearrange the questions by dragging and dropping the "Move" button on the lower right of each panel.
Step 6. If you are done adding questions, click the "Create Questionnaire" or "Update Questionnaire" button.
After you update an existing questionnaire, its status will go back to DRAFT . Do not forget to activate the survey again if it is already published (see Chapter 4.4.3).
4.4. View a Specific Questionnaire
Step 1. Go to Dynamic Tracking, then select Questionnaires.
Step 2. Search the specific questionnaire, and click the View button on the right.
The view page of a questionnaire has three (3) parts:
- Questionnaire details - general information and configuration of the questionnaire
- Questions, Assignments, etc. - in this part, you can view the list of questions of the survey. If a questionnaire is for limited users, you can assign the questionnaire to multiple users on the Assignment tab.
- Report recipients - in this tab, you can assign recipients who will receive a daily report via email. The report contains submissions of the questionnaire.
- Response Stats/ Downloads - you can view and download the response statistics by: region, division or municipality.
If a questionnaire is a tracker, the response stats can be narrow down by an as-of-date filter.
4.4.1. Adding Choices to Each Question
If the classification of a question is either Select, Ranked, or Checkbox, you will still need to add options after creating the survey.
Step 1. On the view questionnaire page, go to the Questions, Assignments, etc. part of the page.
Step 2. On the Questions tab, find the specific question that you want to update and click the edit button on the right.
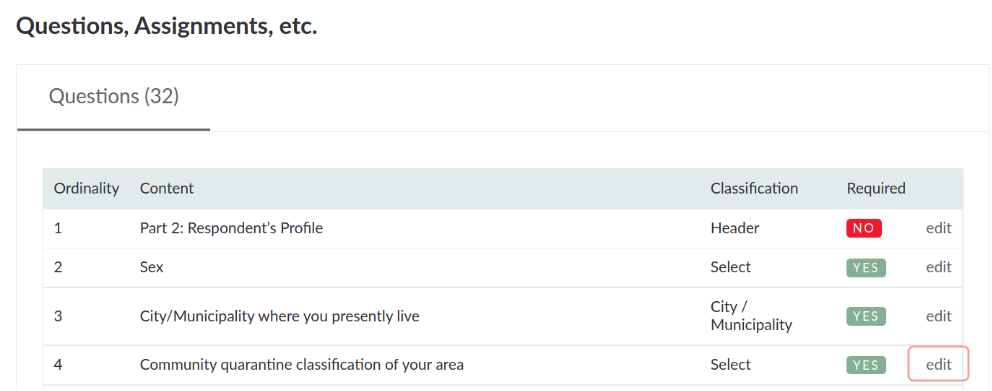
Figure 5. List of Questions Inside the View Questionnaire Page
Step 3. Click the arrow beside options.
Step 4. Click the small box to open actions menu.
Step 5. Click Append.
Step 6. Type in the choice on the value field.

Figure 6. Steps 4 to 6 (from left to right)
Repeat Step 5 and 6 until you have added all the choices.
Step 7. Click the "Update Question" button to save your changes.
4.4.2. Manage Questions
Click on Manage Questions to further edit the items in a questionnaire.
Step 1. Select an item or multiple items by ticking the box beside each item.
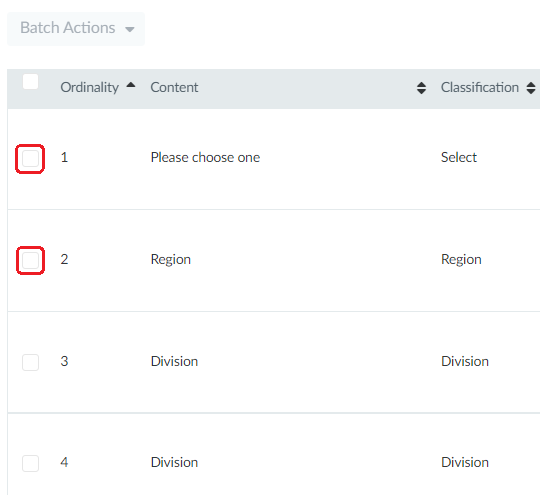
Figure 7. List of Questions in the Manage Questions Page
Step 2. Select a batch action for the item/s selected. There are three batch actions that you can choose from.
- Add to Header - to group items under a header, select consecutive items first (Step 1) and then click on Batch Actions > Add to Header Selected. A dialogue box will appear and you need to choose which header your items will be grouped under (see Figure 8). Items under a header can be hidden or shown when the header is clicked on (like a dropdown feature).
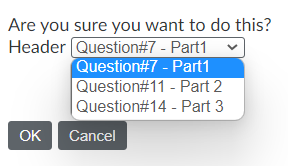
Figure 8. List of Header-Type Questions to Choose from.
- Add to Yes or No - to group items under a yes or no type of question, select the item/s (Step 1) and click on Batch Actions > Add to Yes or No Selected. A dialogue box will appear and you need to choose which yes or no type of question your item will be under. Your item will appear on the questionnaire depending on the value that you will set (see Figure 9).

Figure 9. The select item in Step 1 will only appear in the questionnaire if user answers "Yes" in Question #8.
- Add to Multiple Choice Selected - to group items under a multiple choice type of question, select the item/s (Step 1) and click on Batch Actions > Add to Multiple Choice Selected. A dialogue box will appear and you need to choose which of the multiple choice questions your item will be under. Set the value to one of the choices in the multiple choice type of question. Your item will appear on the questionnaire depending on the value that you will set (see Figure 10).
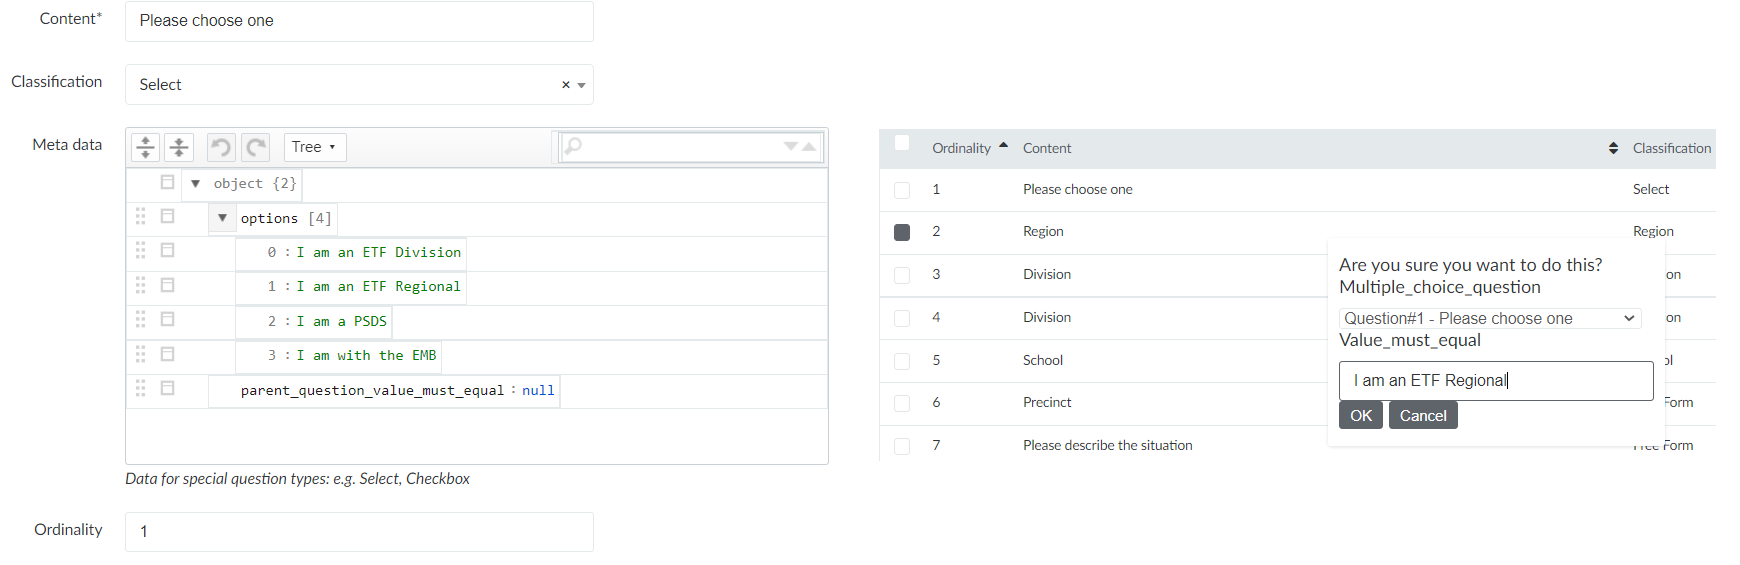
Figure 10. In Figure 15, you can see that the first item is a multiple choice type of question. There are four values that you can choose from the multiple choice. If we add the second item to Question #1 (multiple choice type) and set value to "I am an ETF Regional", then second item will only appear on the questionnaire if your answer to Question #1 is "I am an ETF Regional".
4.4.3. Questionnaire Reports
- Show Responses - click this button to see the list of response entries from the questionnaire. Select a specific entry, and click its view button. This will show you the Report Information of the respondent and their individual response to the questionnaire. A revision history is also available if users are allowed to resubmit responses.
If a questionnaire is a tracker, a unique user can have multiple response entries. If a questionnaire is a survey, a unique can only have exactly one response entry.
- Show Response Stats -click this button to see the statistics for each option of all the questions.
- Extract Responses to CSV - click this button to download a CSV file containing all the responses of the survey
- Regional / Division / Municipality Response Stats - click this to see the number of responses per region, division, or municipality. There is a column for the number of responses from the public schools and private schools along with the sex of the respondent. There is also a column for the percentage of respondents from the total.
- CSV Download - response statistics can be downloaded in a CSV format. You may specify the geographic location of the response stats by selecting region, division, municipality and/or school.
4.4.4. Activate, Close or Archive a Questionnaire
The initial status of a questionnaire is DRAFT . This means that the questionnaire is not yet published on the DepEd Mobile Application.
- Click "Activate Questionnaire" to change the status from DRAFT to ACTIVE . This means that the survey is published and is available to the allowed respondents.
- Click "Close Questionnaire" to change the status from ACTIVE to CLOSED . This means that the allowed respondents could no longer answer the survey.
- Click "Archive Questionnaire" to change the status from CLOSED to ARCHIVED . This means that the questionnaire will be hidden from the list on the Admin Portal.
4.5. Assign Respondents to a Questionnaire
If the allowed respondents of a questionnaire is "Limited DepEd Users", you must assign the survey to specific users. You can either assign a specific user to a questionnaire, or assign multiple users at once.
4.5.1. Assign a Specific User to a Questionnaire
Step 1. Click Users on the navigation bar.
Step 2. Search for the specific user, and click the Edit button on the right.
Step 3. Click "Special Assignments".
Step 4. Click "Add New Survey assignment".
Step 5. On the Questionnaire field, search for the survey using its name.
NOTE: Only active questionnaires with "Limited DepEd Users" as the allowed respondents will be available on this list.
Step 6. Click the "Update User" button.
4.5.2. Assign Multiple Users to a Questionnaire
Step 1. Go to Dynamic Tracking, then select Questionnaires.
Step 2. Search the specific questionnaire, and click the View button on the right.
For easier search, narrow down the list of questionnaires by clicking the “Limited” filter on top of the page.
Step 3. Under the “Questions, Assignments, etc.”, click on the “Assigned Users” tab.
Step 4. Click the “Choose file” button, and select the CSV file containing the email addresses of the users you want to assign the questionnaire to.
You can download the CSV template by clicking the “Download this sample template file” link.
Step 5. Click the “Upload” button.

Figure 11. Assigned Users Tab
4.6. Unassign Respondent from a Questionnaire
The steps for removing the assignment of a respondent from a questionnaire is similar to the steps described in the previous chapter.
Step 1. Click Users on the navigation bar.
Step 2. Search for the specific user, and click the Edit button on the right.
Step 3. Click "Special Assignments".
Step 4. Tick the checkbox for "Remove this assignment?"
Step 5. Click the "Update User" button.

Figure 12. Remove Survey Assignment from Respondent
4.7. Edit a Questionnaire
Step 1. Go to Dynamic Tracking, then select Questionnaires.
Step 2. Search the specific questionnaire, and click the Edit button on the right.
Step 3. Update the questionnaire details.
Step 4. Click the "Update Questionnaire" button.
After editing a questionnaire, its status will go back to DRAFT . Do not forget to activate the survey again if it is already published (see Chapter 4.4.3).
5. Facility Tracking (COVID-19 Response)
The Facility Tracking module is a list of responses submitted by the approved DepEd users who have answered the COVID-19 Facility Tracker survey, which is specifically about the use of school facilities during this pandemic.
To access this module, click COVID-19 Response on the navigation bar, then select Facility Tracking. The responses can be categorized in three (3) statuses:
- In Utilization - schools that are currently used during this COVID-19 situation
- LGU Requested - schools which have been requested for use
- Not Used - schools which are not in use
On the top, you can filter the list by clicking a specific status. For example, in Figure 8, "In Utilization" has been clicked, that is why the list only displayed responses with that status.
On the bottom, you can download the list of responses displayed by clicking CSV.
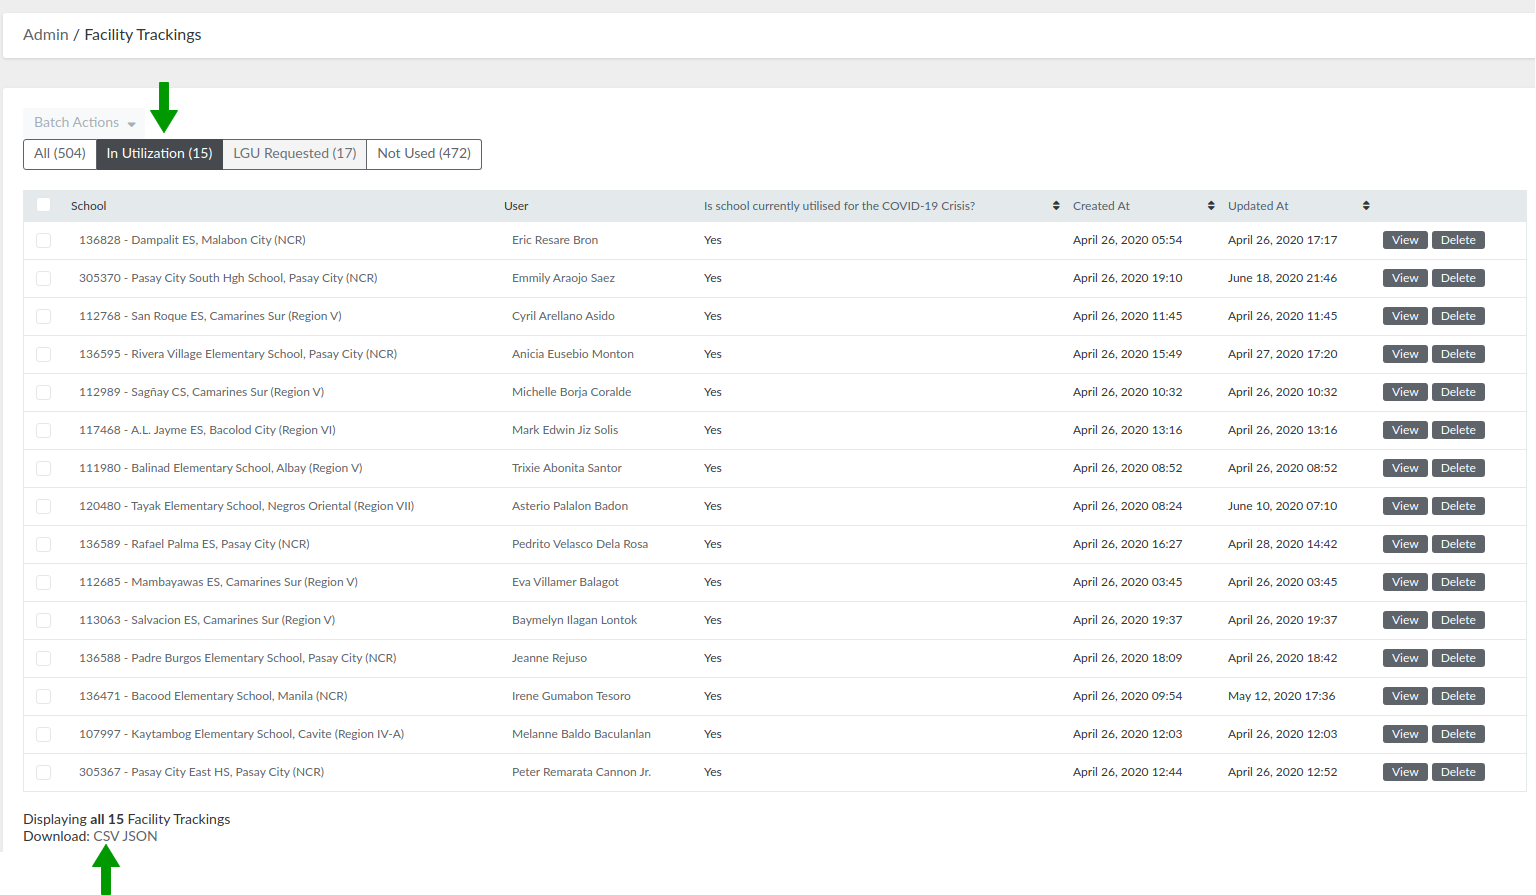
Figure 13. Facility Tracking
6. Memorandums
Administrators can setup memos and official announcements published on the DepEd Mobile Application that can be viewed by the approved DepEd users. To view these, click Memorandums on the navigation bar.

Figure 14. Sample Memorandum on DepEd Mobile Application
7. Vaccination Dashboard
This dashboard shows the overall summary and regional statistics of the Self-Reporting for COVID-19 Vaccination tracker. The tracker is designed to monitor DepEd personnel on their COVID-19 vaccination.
The overall summary shows the total number of respondents, vaccinated first dose, vaccinated second dose, and brand of vaccine received as well as other related data.
In the Regional Vaccination tab, select a region to show region summary page. The region summary page contains the same table as the overall summary except the statistics shown is the region you selected. There is a tab for Divisional Vaccination data where you can select a division that will redirect you to the Division Summary page.
The Division Summary page has the same table as the overall and regional summary but the are values for the selected division. Schools Vaccination data is also displayed in this page. The schools listed on the Schools Vaccination page are the schools under the selected division.
No Comments