
Guide for DITO
1. Login as an Administrator
The homepage of DepEd Monitoring is at mobileapp.deped.gov.ph. To login as an administrator, you will see the "Admin Login" link at the lower right portion of the page. Click it and input your administrator credentials on the login form. Click login and you will be redirected to the Admin Portal Dashboard.
On your initial login, you will be redirected to your account profile. You will be asked to update your temporary password.
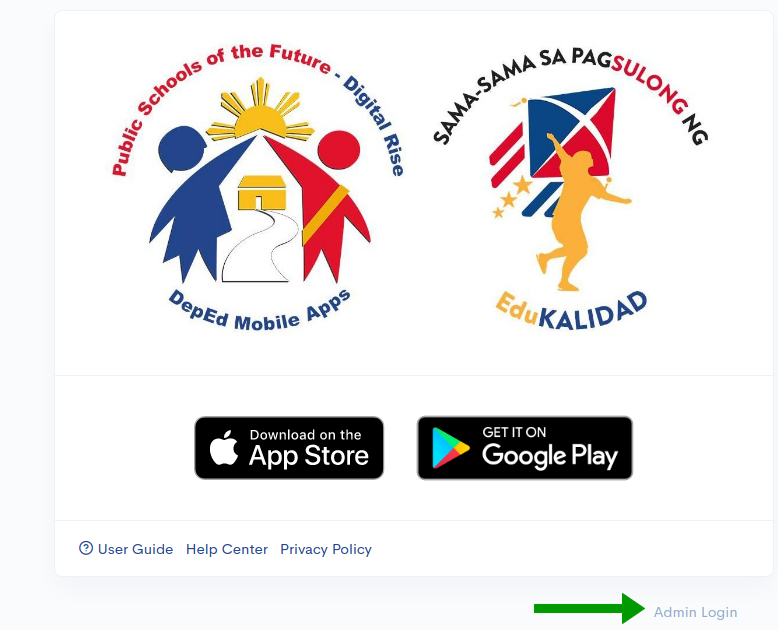

Figure 1. DepEd Monitoring Landing Page (left) and Admin Login Page (right)
2. Admin Portal Interface
The user interface for the Admin Portal is very straightforward and easy-to-use. In this chapter, we will discuss the four (4) main parts of this portal.
- Navigation Bar - In this portion, you will see a list of links that will help you access different parts of the Admin Portal.
- Main Content - In this portion, all of the information are displayed in table form. There will be action buttons (view, edit, or delete) for each row. In most modules, there will be a New button displayed on the upper-right part.
- Account actions - you can view your account by clicking this button
 . To logout, simply click this button
  .
. - Filter - to narrow down the list or data displayed in the Main content, you can use the filter fields in this portion. The available fields will vary depending on which module you are currently in.
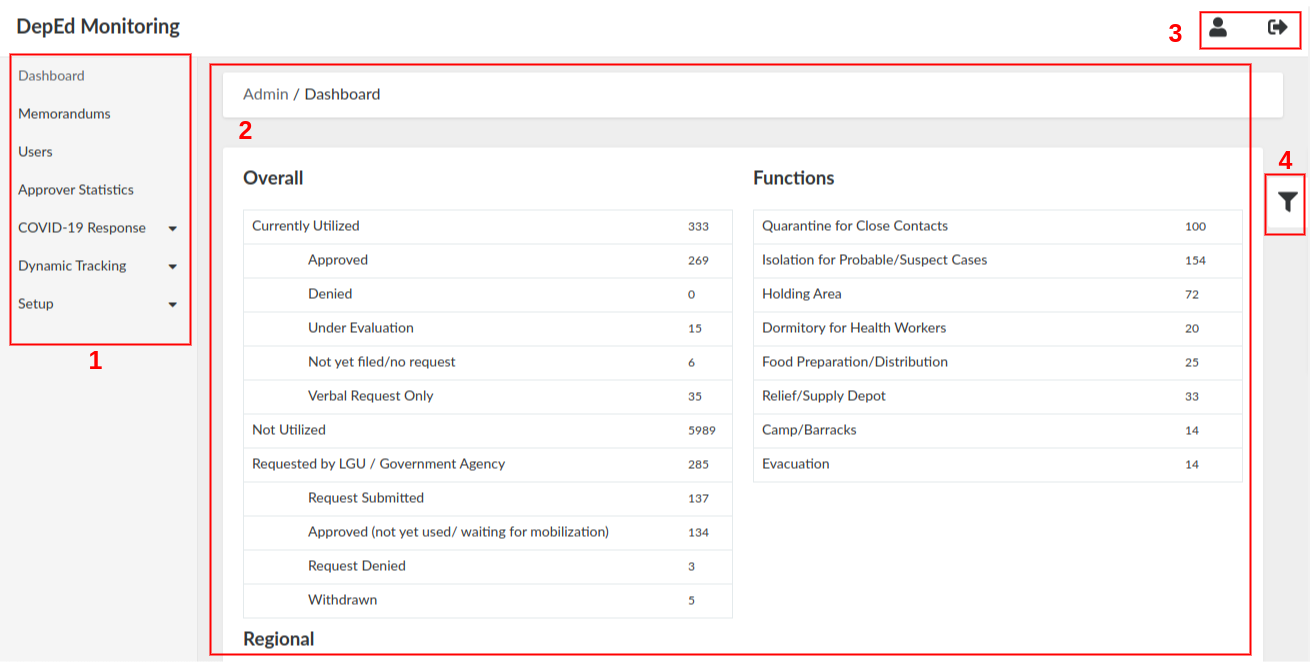
Figure 2. Admin Portal Dashboard
2.1. Dashboard
Dashboard is the homepage of the Admin Portal (see Figure 2). It contains the statistics of the responses gathered from the Facility Tracking survey (COVID-19 Responses).
The figures displayed here will change depending on what type of administrator is currently logged in. For example, as a Division IT Officer (DITO), you can only see the data here within your designated division and the schools under it.
3. User Management
There are two kinds of users in DepEd Monitoring: an administrator and a normal user (survey respondents). As a DITO administrator, you can only access the users list.
3.1. View User List
To view all the respondents, simply click Users on the navigation bar. As a DITO, only users within your designated division will be displayed in the list.
On the top, you can filter the list by clicking a specific status:
-
- Active - approved users
- Pending Approval - users that have confirmed their account, but are not yet approved
- Rejected - users that have confirmed their account, but are rejected
- Unconfirmed Registrations - users that have not yet confirmed their account
More filters are available if you click the filter icon on the right. Available filter fields are: Email, Email validation status, Name, Mobile, Created at.
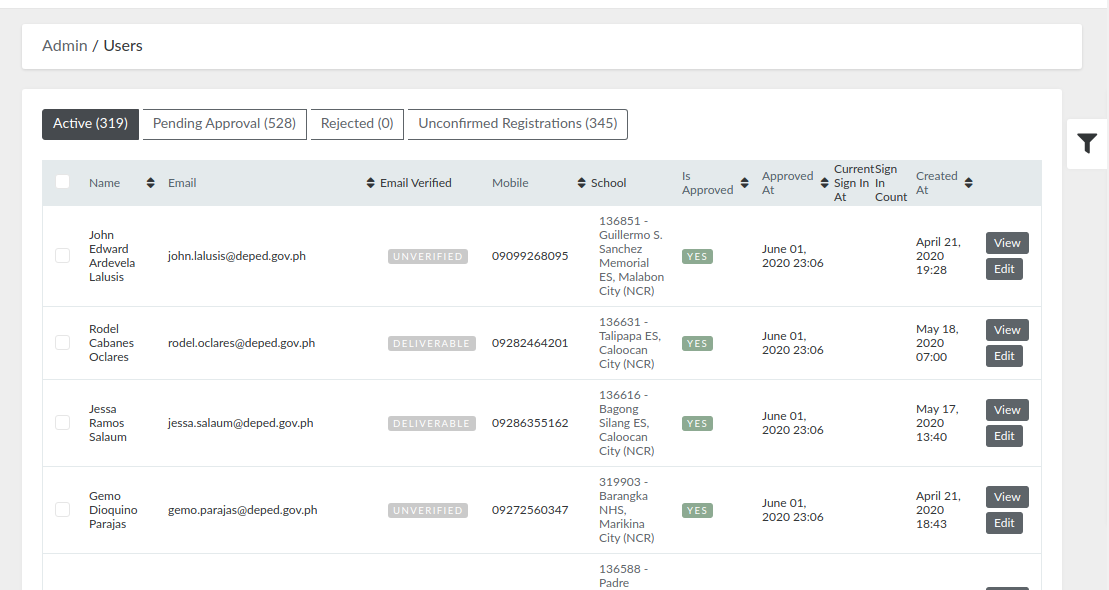
Figure 3. User List
3.2. View a Specific User
Step 2. Search the specific user, and click the View button on the right.
In the view page, you can see the following data:
-
- User details - general information of the user
- Special assignments - surveys they are assigned to answer
3.3. Approve or Reject a User
An account can only be approved or rejected if the user has already confirmed their email address. To approve or reject a user, follow these simple steps:
Step 2. For easier search, click the "Pending Approval" filter on top of the page, then search using their email, name, or mobile number.
Step 3. Click the View button on the right.
Step 4. Click the Approve or Reject button on the upper-right portion of the view page.
-
- Some users registered twice using a DepEd email and personal email. Reject non-DepEd email registration.
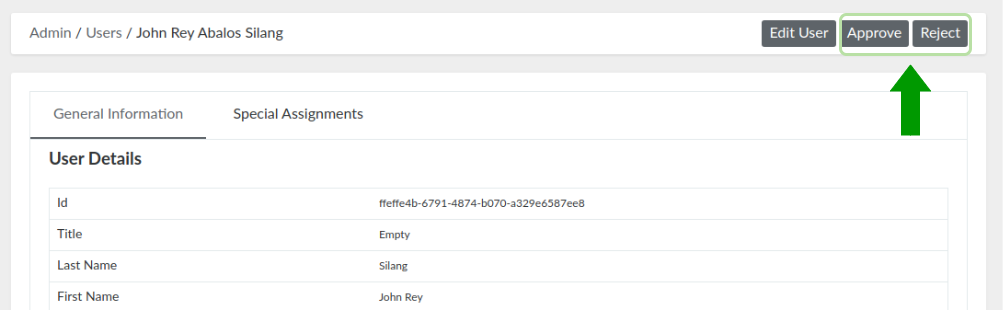
Figure 4. Approve User Button
Approved users will receive a welcome email and will be eligible to use the DepEd Mobile Application. While rejected users will only receive a rejection email, and will not gain access to use the mobile application.
3.3.1. Approver Statistics
In this module, you can view a list of administrators within your designated division and their corresponding number of users approved. To access this, simply click Approver Statistics on the navigation bar.
You can generate a CSV report of this by clicking the "Export to CSV" button on the upper-right.
These statistics can only be filtered depending on the date of approval of the users. You can select whether the users are approved within the day, week or month.
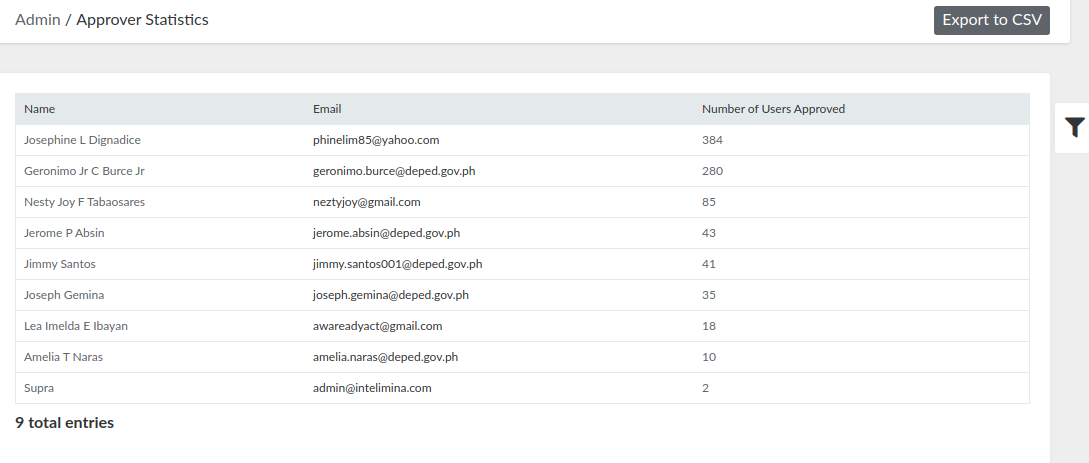
Figure 5. Approver Statistics
3.4. Edit a User
Step 2. Search the specific user, and click the Edit button on the right.
Step 3. Update the user details.
Step 4. Click the "Update User" button.
Another thing that can be done on the user edit form is assigning the user to survey(s). This will be discussed in detail on Chapter 4.3.
4. Questionnaire Management
4.1. View Questionnaire List
To view all the questionnaires, go to Dynamic Tracking, then select Questionnaires.
On the top, you can filter the list by the questionnaire's allowed respondents (DepEd Users, Limited, Parents, or Students). You can also view all the archived ones by clicking the "Show Archived Questionnaires" button.
More filters are available if you click the filter icon on the right. Available filter fields are: Title, Description, Status, Created at and Updated at. Email validation status, Name, Mobile, Created at.
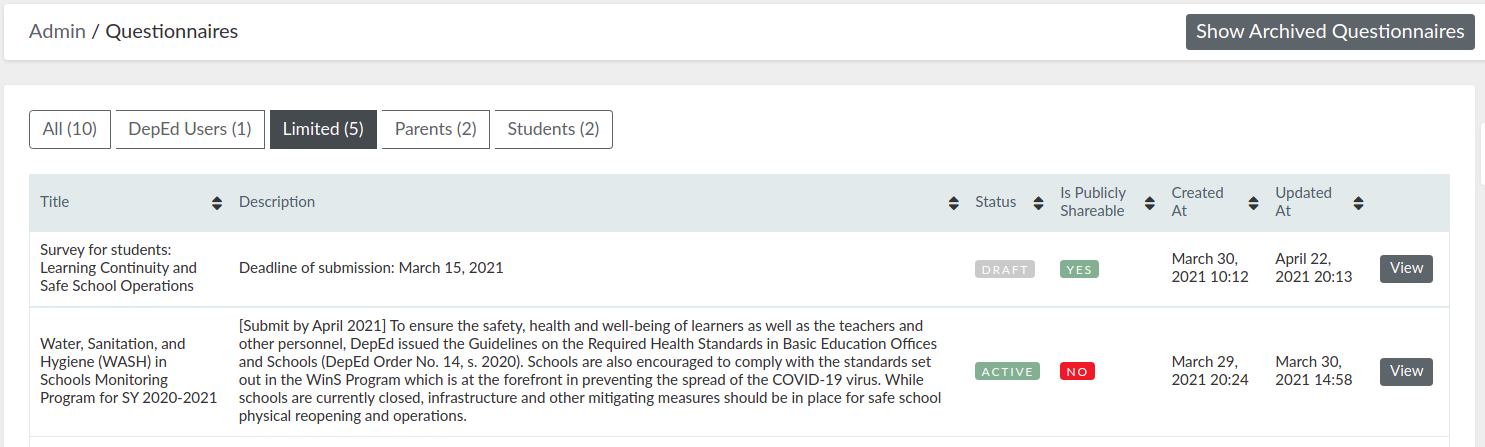
Figure 6. Questionnaire List
4.2. View a Specific Questionnaire
Step 1. Go to Dynamic Tracking, then select Questionnaires.
Step 2. Search the specific questionnaire, and click the View button on the right.
The view page of a questionnaire has three (3) parts:
- Questionnaire details - general information and configuration of the questionnaire
- Questions, Assignments, etc. - in this part, you can view the list of questions of the questionnaire. If a questionnaire is for limited users, you can also view all its assigned users.
- Report recipients - in this tab, you can assign recipients who will receive a daily report via email. The report contains submissions of the questionnaire.
- Response Stats/ Downloads - you can view and download the response statistics by: region, division or municipality.
If a questionnaire is a tracker, the response stats can be narrow down by an as-of-date filter.
4.2.1. Questionnaire Reports
- Show Responses - click this button to see the list of response entries from the questionnaire. Select a specific entry, and click its view button. This will show you the Report Information of the respondent and their individual response to the questionnaire. A revision history is also available if users are allowed to resubmit responses.
If a questionnaire is a tracker, a unique user can have multiple response entries. If a questionnaire is a survey, a unique can only have exactly one response entry.
- Show Response Stats - click this button to see the statistics for each option of all the questions.
- Extract Responses to CSV - click this button to download a CSV file containing all the responses of the survey for your assigned division.
- Division / Municipality Response Stats - click this to see the number of responses in your designated division and the municipalities within the division. There is a column for the number of responses from the public schools and private schools along with the sex of the respondent. There is also a column for the percentage of respondents from the total.
- CSV Download - response statistics can be downloaded in a CSV format. You may specify the geographic location of the response stats by selecting your designated division, and then any municipality and/or school within that division.
4.3. Assign Respondents to a Questionnaire
If the allowed respondents of a questionnaire is "Limited DepEd Users", you must assign the survey to specific users. To do this, follow these steps:
Step 1. Click Users on the navigation bar.
Step 2. Search for the specific user, and click the Edit button on the right.
Step 3. Click "Special Assignments".
Step 4. Click "Add New Survey assignment".
Step 5. On the Questionnaire field, search for the survey using its name.
NOTE: Only active and questionnaires with "Limited DepEd Users" as the allowed respondents will be available on this list.
Step 6. Click the "Update User" button.
4.4. Unassign Respondent from a Questionnaire
The steps for removing the assignment of a respondent from a questionnaire is similar to the steps described in the previous chapter.
Step 1. Click Users on the navigation bar.
Step 2. Search for the specific user, and click the Edit button on the right.
Step 3. Click "Special Assignments".
Step 4. Tick the checkbox for "Remove this assignment?"
Step 5. Click the "Update User" button.

Figure 7. Remove Survey Assignment from Respondent
5. Facility Tracking (COVID-19 Response)
The Facility Tracking module is a list of responses submitted by the approved DepEd users who have answered the COVID-19 Facility Tracker survey, which is specifically about the use of school facilities during this pandemic. This list is filtered within your designated division only.
To access this module, click Facility Tracking on the navigation bar, then select COVID-19 Response. The responses can be categorized in three (3) statuses:
- In Utilization - schools that are currently used during this COVID-19 situation
- LGU Requested - schools which have been requested for use
- Not Used - schools which are not in use
On the top, you can filter the list by clicking a specific status. For example, in Figure 16, "In Utilization" has been clicked, that is why the list only displayed responses with that status.
On the bottom, you can download the list of responses displayed by clicking CSV.
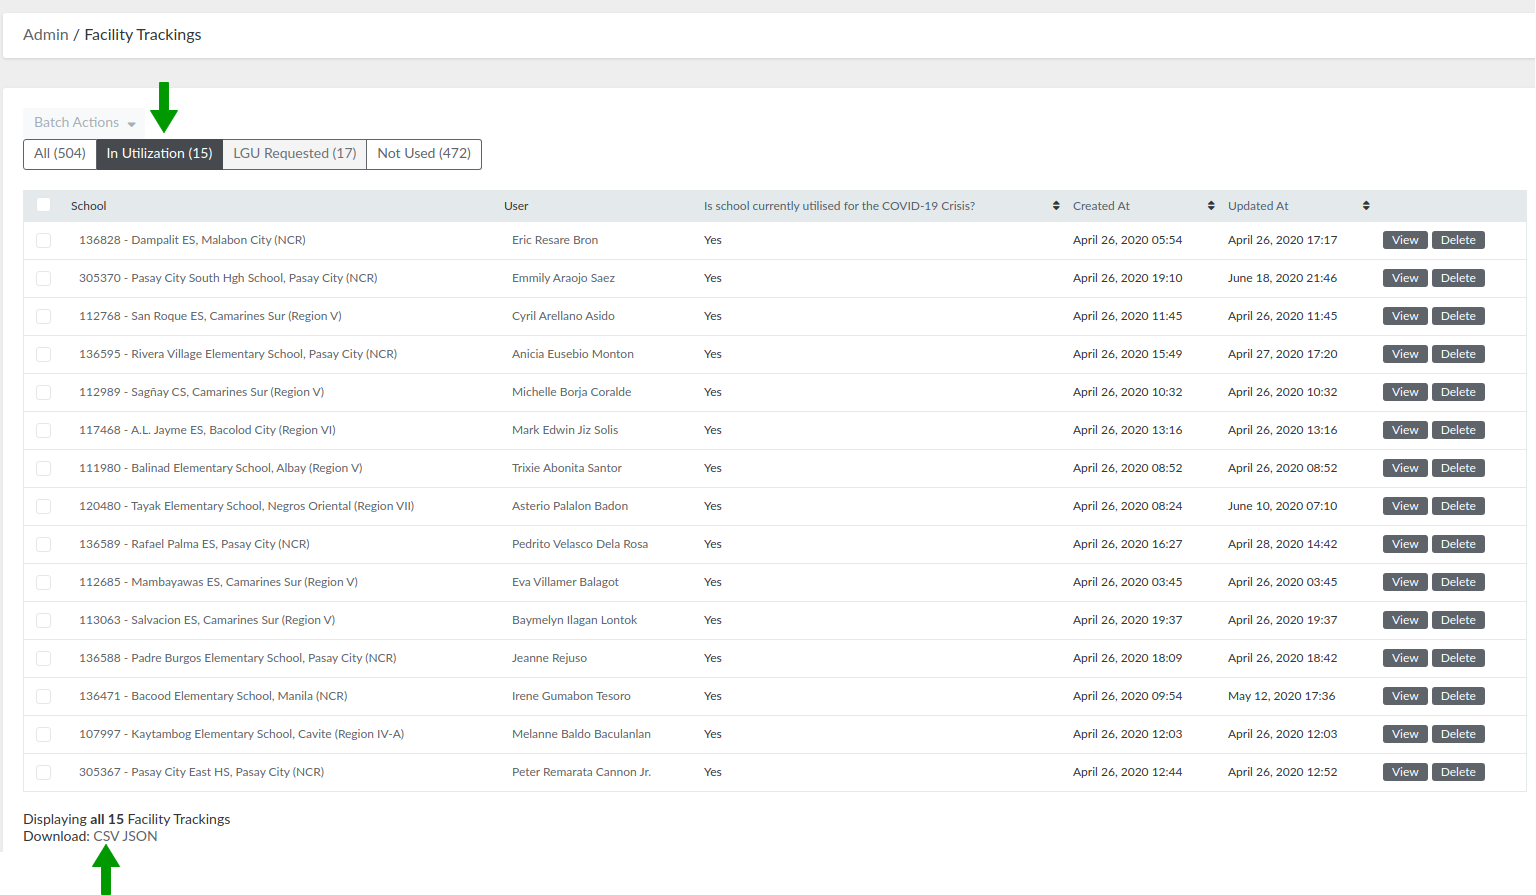
Figure 8. Facility Tracking
6. Memorandums
Administrators can setup memos and official announcements published on the DepEd Mobile Application that can be viewed by the approved DepEd users. To view these, click Memorandums on the navigation bar.

Figure 9. Sample Memorandum on DepEd Mobile Application
No Comments